Setting Up HAProxy as a Reverse Proxy on pfSense for Internal Services
In one of our previous articles, we explored setting up Let's Encrypt on pfSense to obtain SSL certificates for private domains. Using these SSL certificates is essential for securing communications within private networks. But how do we effectively route traffic to internal services using private domains? The answer is a reverse proxy.
A reverse proxy serves as a gateway, forwarding client requests to backend services and returning their responses to the client. While popular options like Nginx and Traefik are often used, this guide focuses on setting up HAProxy as a reverse proxy directly on pfSense.
Let's dive into the step-by-step process.

Why Choose HAProxy on pfSense?
HAProxy is an excellent choice for a reverse proxy due to its:
- High performance: Optimized for handling thousands of concurrent connections.
- Built-in support on pfSense: Available as a package for easy installation and integration.
- TLS Termination: Simplifies SSL/TLS management by offloading encryption to HAProxy.
Using HAProxy on pfSense allows you to consolidate your firewall, router, and reverse proxy into a single appliance, reducing complexity.
Prerequisites
Before we begin, ensure the following:
- pfSense Installed and Configured: Have pfSense installed and running in your environment.
- Let's Encrypt SSL Certificates: Certificates for your private domain are already configured on pfSense. (Refer to our earlier guide if you need assistance.)
- Private Domain Setup: Your internal DNS or pfSense DNS Resolver should resolve private domain names to the IP address that HAProxy is listening on.
- Access to Backend Services: Verify that your internal services are operational and accessible.
Step 1: Install the HAProxy Package
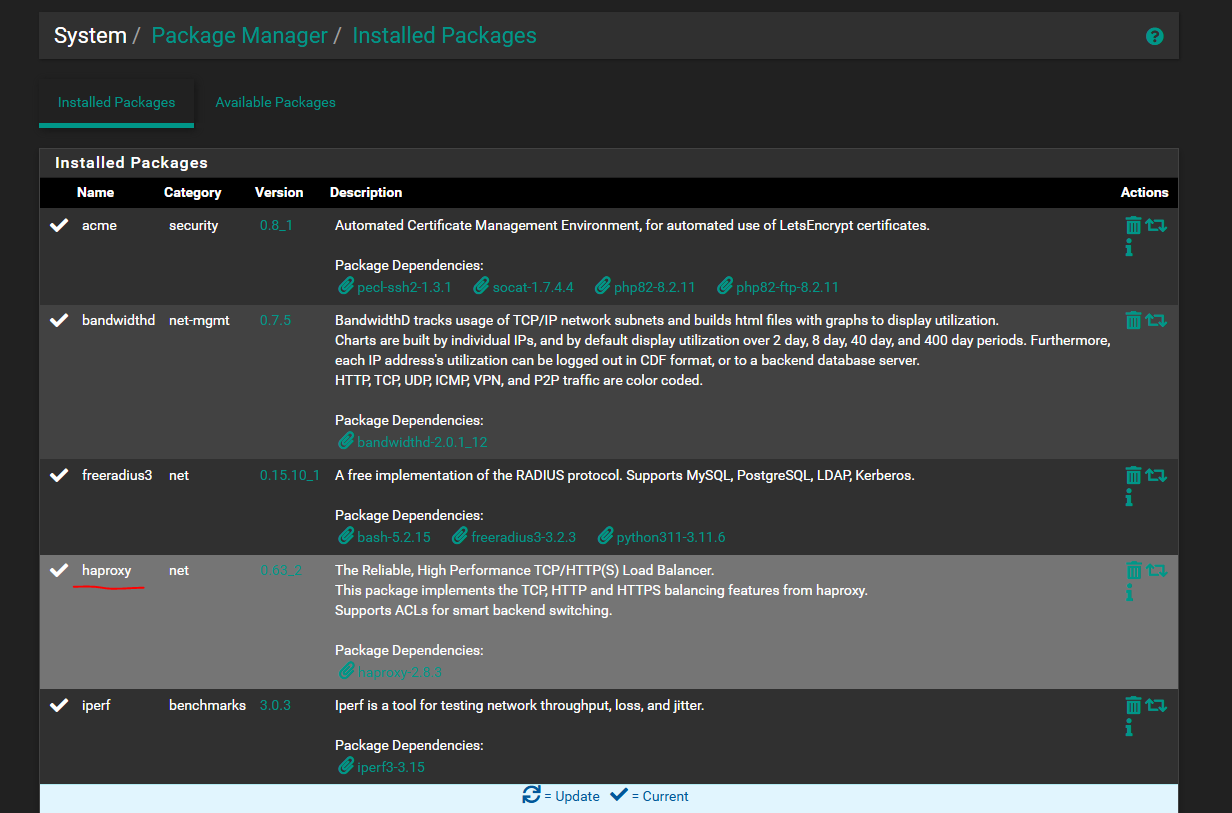
- Log in to your pfSense web interface.
- Navigate to System > Package Manager > Available Packages.
- Search for HAProxy.
- Click Install, then confirm.
Step 2: HAProxy Settings
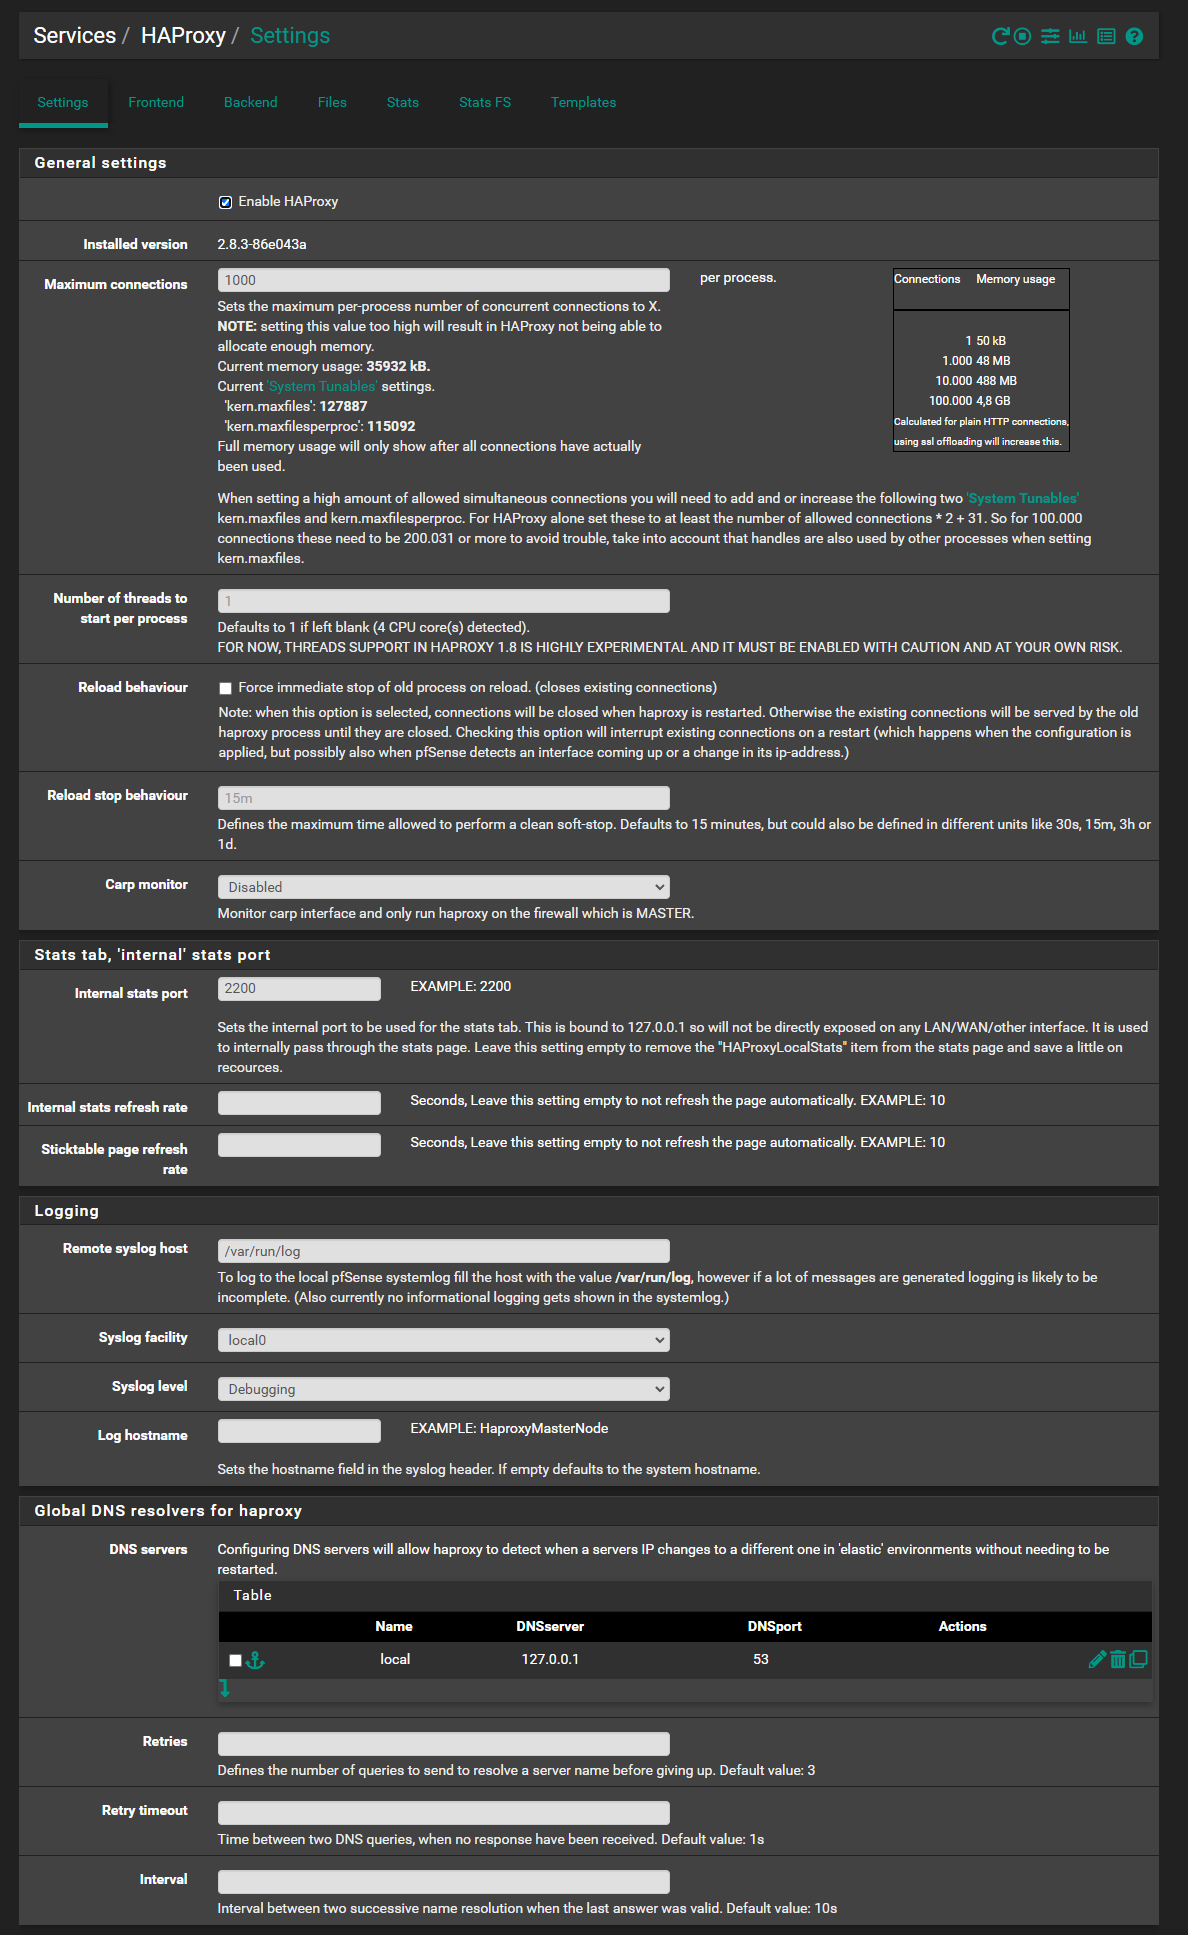
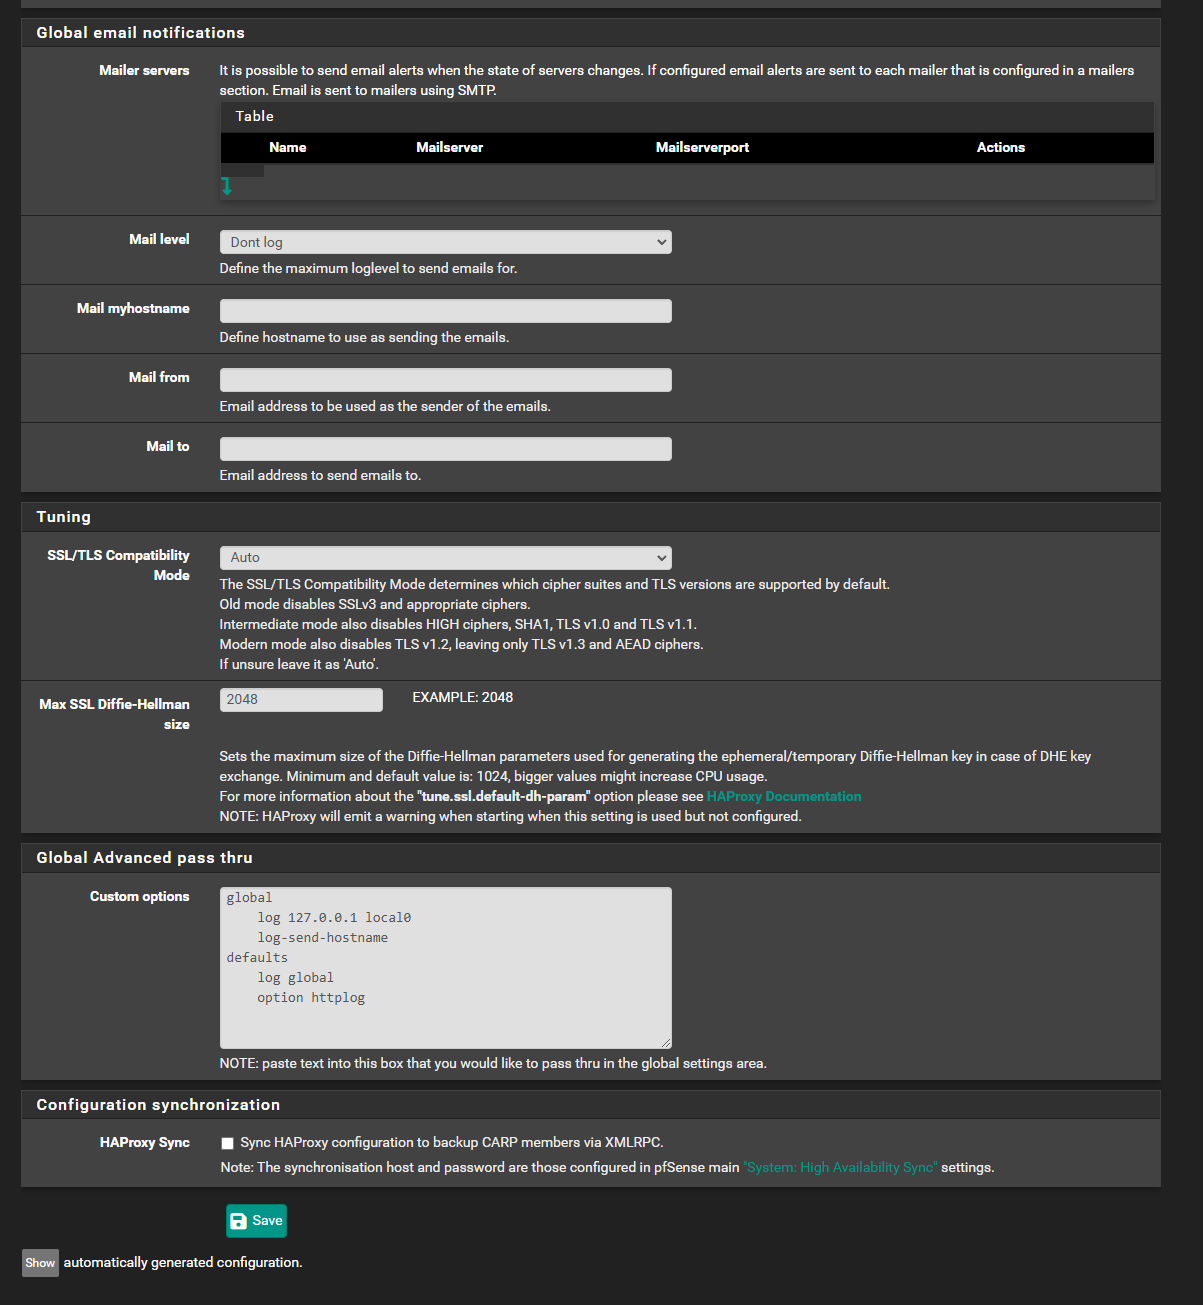
- Navigate to Services > HAProxy.
- Click Settings and configure the following:
- Enable HAProxy: Check the box to enable the service.
- Max Connections: Set this value based on your environment (e.g., 2000 for small networks).
- Internal Stats Port: Set the port number to 2200 to enable the statistics page.
- Logging:
- Set the Remote syslog host to /var/run/log.
- Set Syslog facility to local0.
- Set Syslog level to Debugging or Informational
- DNS Servers:
- As we are using HAProxy to resolve private domain name, it is important to add our internal DNS. In this case, it should be 127.0.0.1 which is the localhost of our pfSense router
- Save the settings.
Step 3: Create a Backend Server
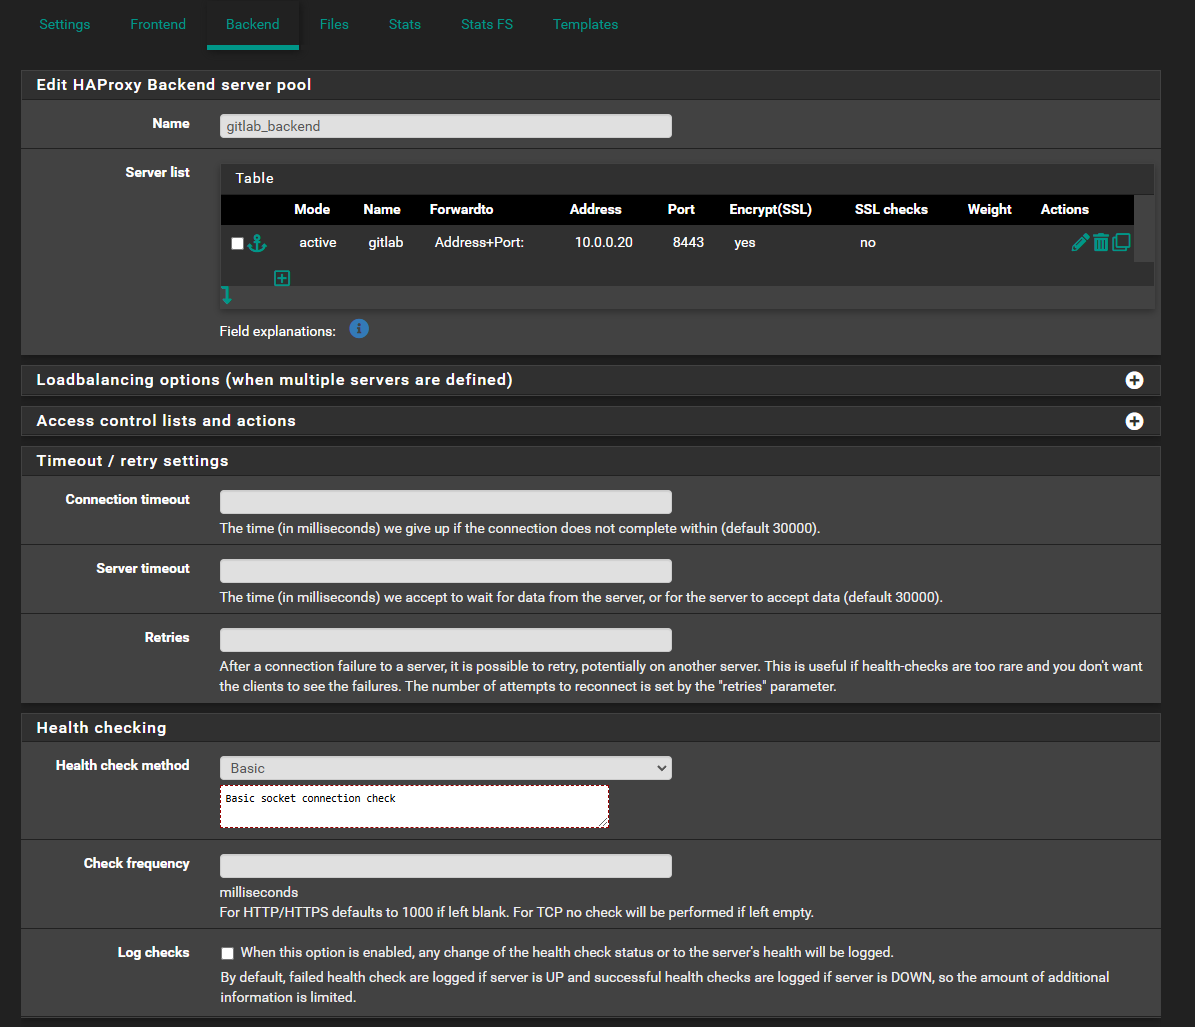
- Go to the Backend tab and click Add.
- Configure each internal service as a backend:
- Name: Enter a unique identifier (e.g., web_server_1).
- Server List:
- Name: Enter a name for the backend. If there are multiple backend for the same service, make sure the name is unique.
- Forwardto: Use Address+Port
- Address: This the address that the internal service is reachable. FQDN can be used here too.
- Encrypt(SSL): Check this if it is using HTTPS.
- SSL checks: If a self-signed certificate is used, this should be set to no.
- Health Checking: Enable health checks to monitor backend server availability. If the backend is using HTTPS, it is recommended to use Basic. If the backend is using HTTP, you may use either Basic or HTTP. The health of the backend is shown on the stats page.
- Save your settings.
DO NOT DUPLICATE EXISTING BACKEND CONFIG. ALWAYS CREATE FROM SCRATCH. WHEN THE CONFIG IS DUPLICATED, THE ID IS NON-UNIQUE. AND THIS MAY RESULT IN TOO MANY REDIRECT ERROR ON YOUR BROWSER.
Step 4: Create a Frontend
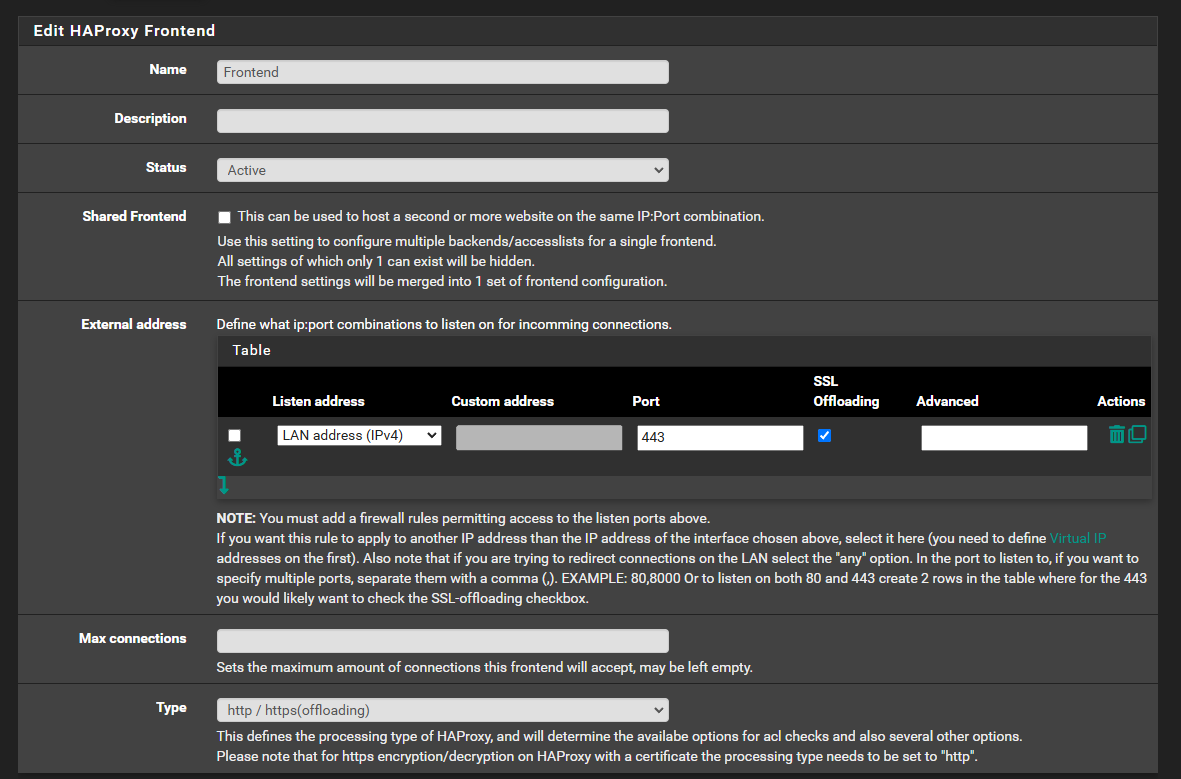
- Navigate to the Frontend tab and click Add.
- Configure the frontend to accept traffic for your private domain:
- Name: Enter an unique name (e.g., frontend_main).
- Status: Active
- External address:
- Listen Address: Select your WAN or LAN IP (depending on access requirements).
- Port: Specify the port to listen on (e.g., 443 for HTTPS).
- SSL Offloading: Enable this and choose your Let's Encrypt certificate.
- Type: http/https(offloading).
- Save and apply the configuration.
Step 5: Configure ACLs and Conditions
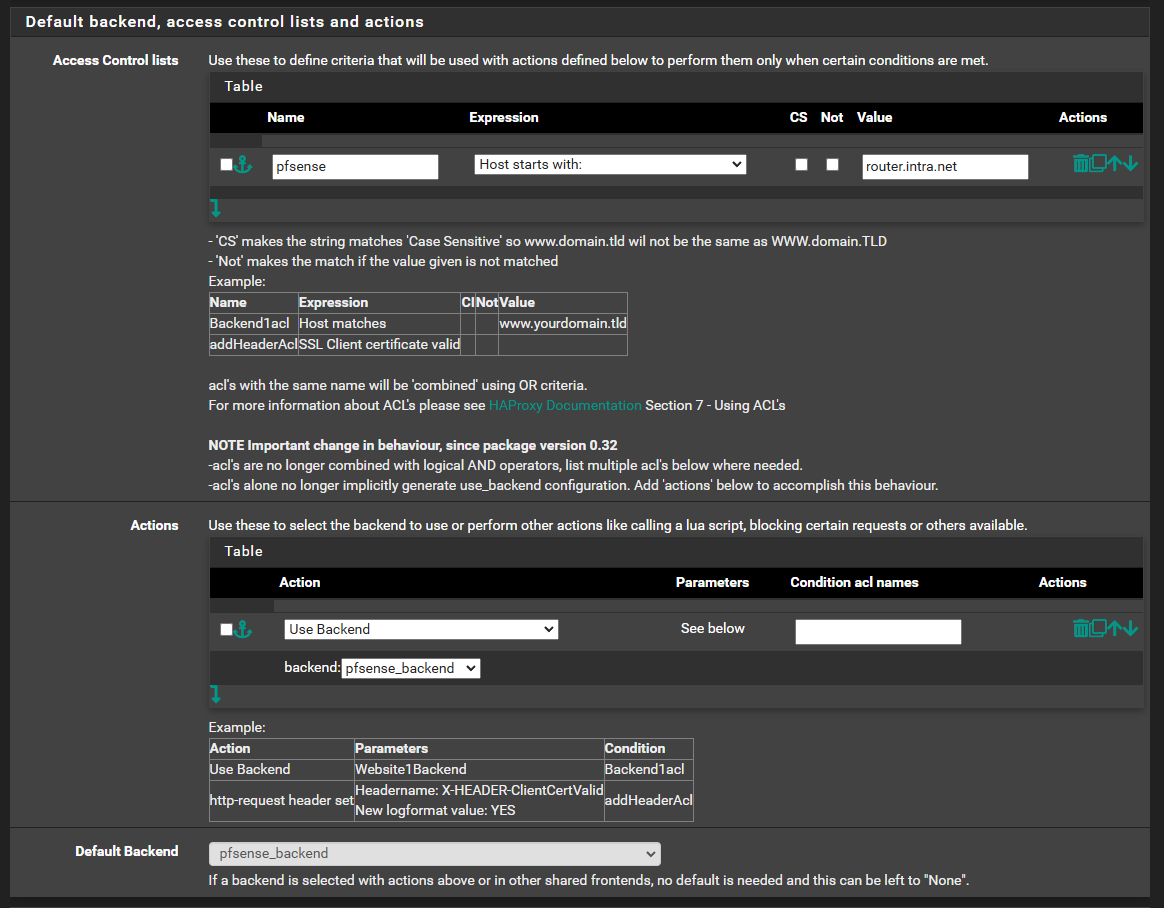
If you have multiple services and need to route traffic based on the domain or URL:
- Add ACLs (Access Control Lists):
- Name: Enter the name of the ACL. this will have to match the condition in the action
- Expression: The expression to be used for the condition. e.g. Host starts with
- Value: The value to be matched against. This will depend on the expression that was selected.
- Add Actions:
- Action: Choose Use Backend
- backend: choose the backend that you want to use
- Condition acl names: this should match the ACL name that was created above.
- Default Backend: This is the backend to use if none of the conditions in ACL matches.
- Save and apply.
Step 6: Configure SSL Offloading
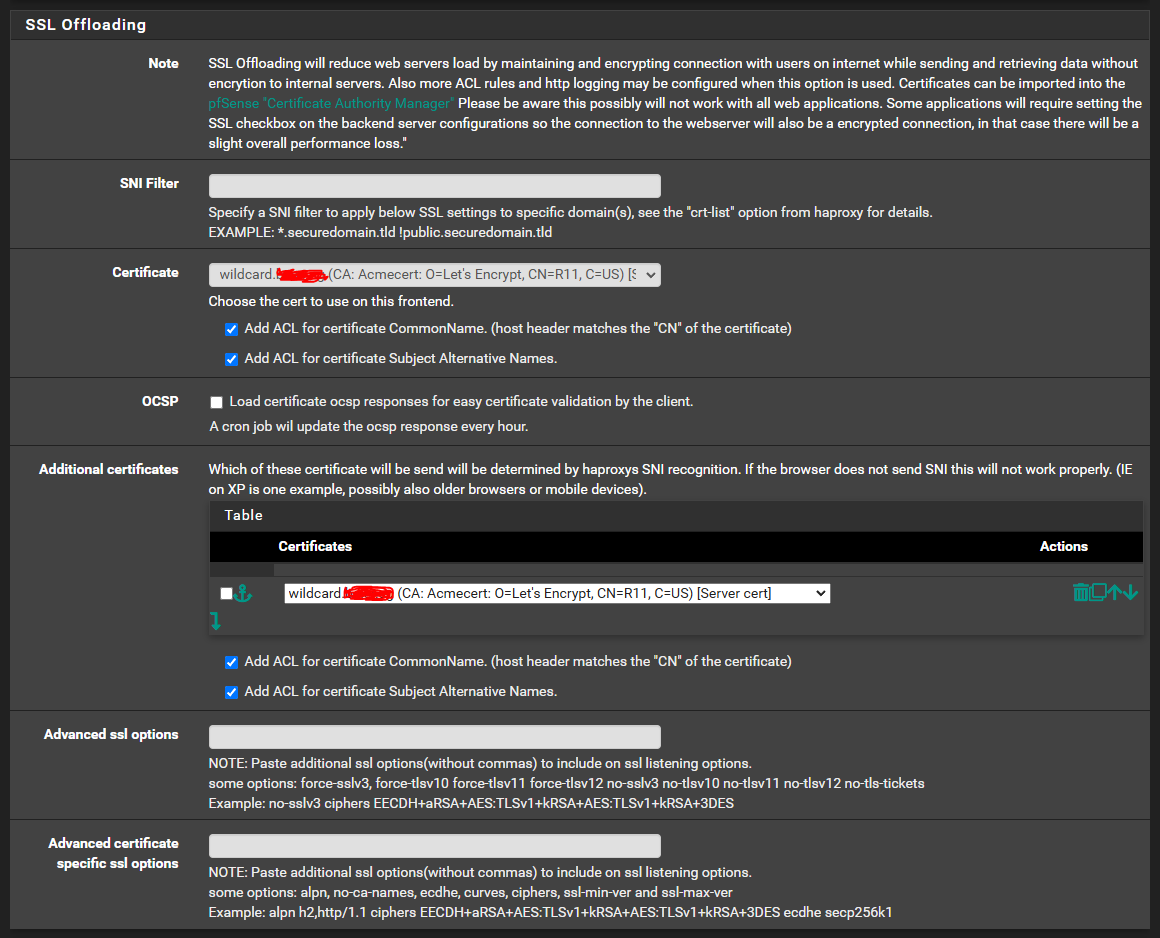
Configure the SSL certificate to be used by each domain that is being configured in previous step.
- Select a certificate.
- Check Add ACL for certificate CommonName
- Check Add ACL for certificate Subject Alternative Names
- If multiple certificates are needed for different domains, you may add them under Additional certificates
- Save and apply.
Step 7: Test Your Configuration
- Open a browser and navigate to your private domain (e.g., https://web.example.com).
- Verify that:
- The SSL certificate is correctly applied.
- Traffic is routed to the appropriate backend service.
- Statistics are accessible on the internal stats port.
- Check logs under Status > System Logs > HAProxy for troubleshooting.
0 Comments