Setup Portainer Single Sign-On with Azure AD via Custom OAuth Setting
In recent years, Docker has gained widespread popularity, and many companies have adopted containerization for their applications. However, managing containers has become a major challenge for many organizations. To address this issue, solutions like Kubernetes and OpenShift were developed. However, Kubernetes may not be the best fit for everyone. Personally, I prefer to keep things simple, and I have been using Portainer to manage my containers for several years. I primarily use its web interface, but I occasionally use the terminal as well.
Portainer offers two editions: Community and Business. For small teams, the Business edition may not be the ideal choice due to its cost. In this article, we will explore how to set up Single Sign-On (SSO) using Azure AD with Custom OAuth, which is a feature of the Business edition of Portainer. This will enable us to leverage the benefits of SSO without having to purchase the Business edition.
Azure Settings
Registrating a new application
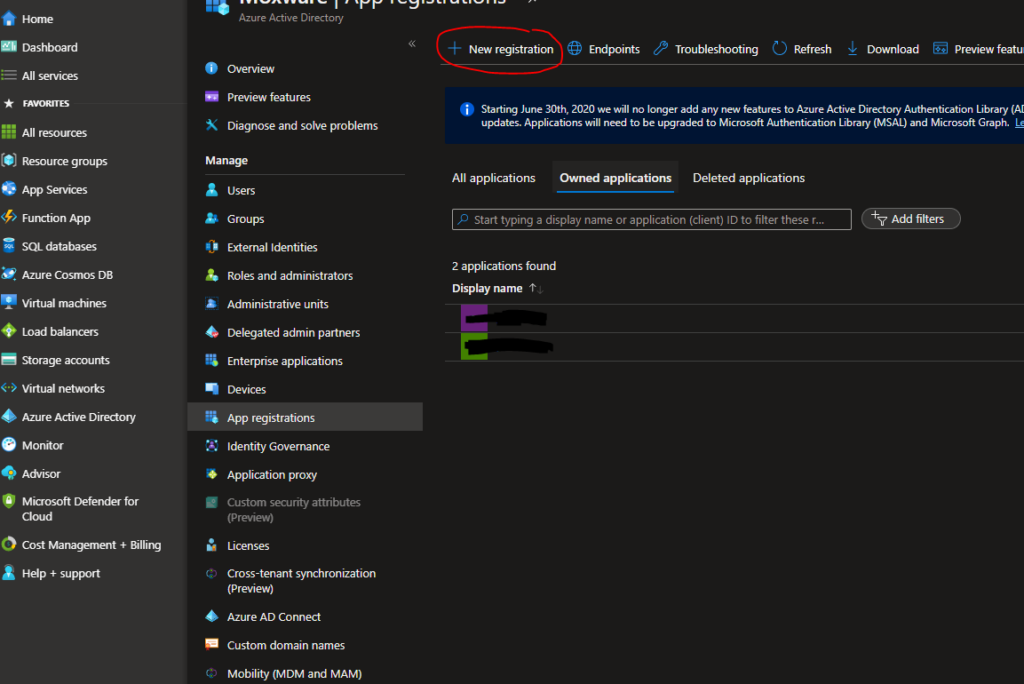
To add a new application in Azure Active Directory using App Registration, follow these steps:
-
Go to the Azure portal and navigate to Azure Active Directory.
-
In the left-hand menu, click on App registrations.
-
Click on the + New registration button to start creating a new application.
-
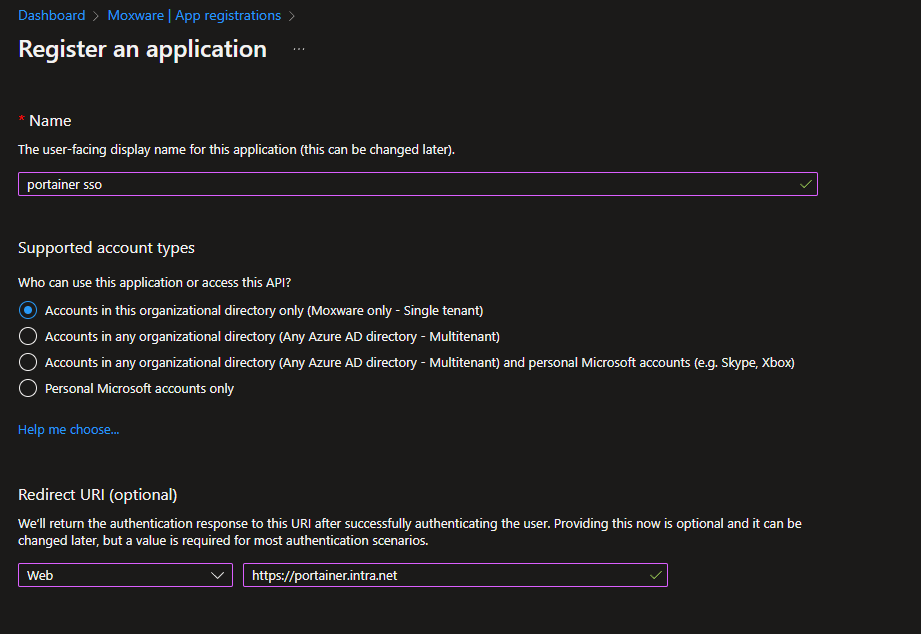
In the Register an application page, provide a name for your application in the "Name" field.
-
Under Supported account types, select the appropriate option based on your requirements. If you want the application to be accessible to all users in your organization, select Accounts in this organizational directory only. If you want the application to be accessible to users outside of your organization, select Accounts in any organizational directory.
-
In the Redirect URI section, enter the URI that Portainer will use to redirect users after authentication. This should match the URI that you specified in the Portainer OAuth settings.
-
Click on Register to create the application.
Client ID
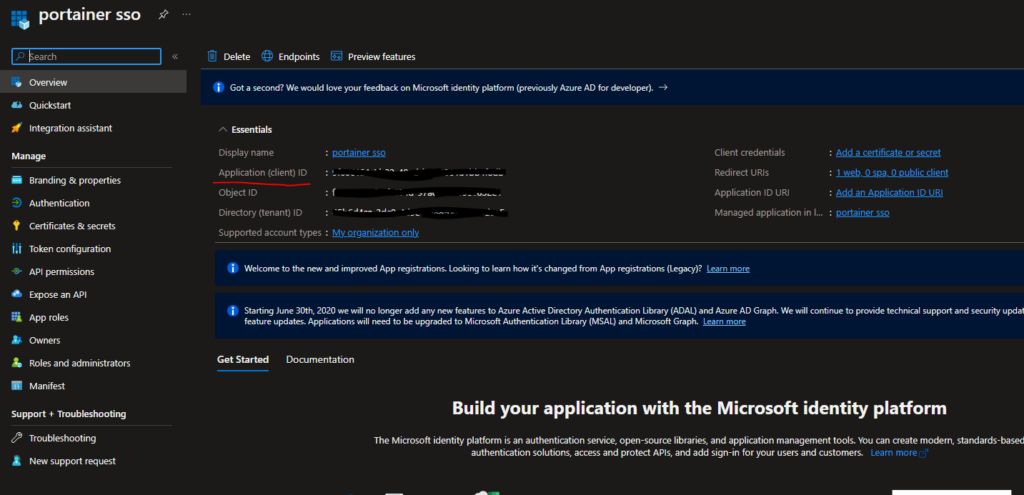
In the app's overview page, take note of the Application (client) ID value, which is also known as the Client ID. This value will be needed later when configuring the Portainer OAuth settings, so make sure to save it in a secure location.
Generate Secret
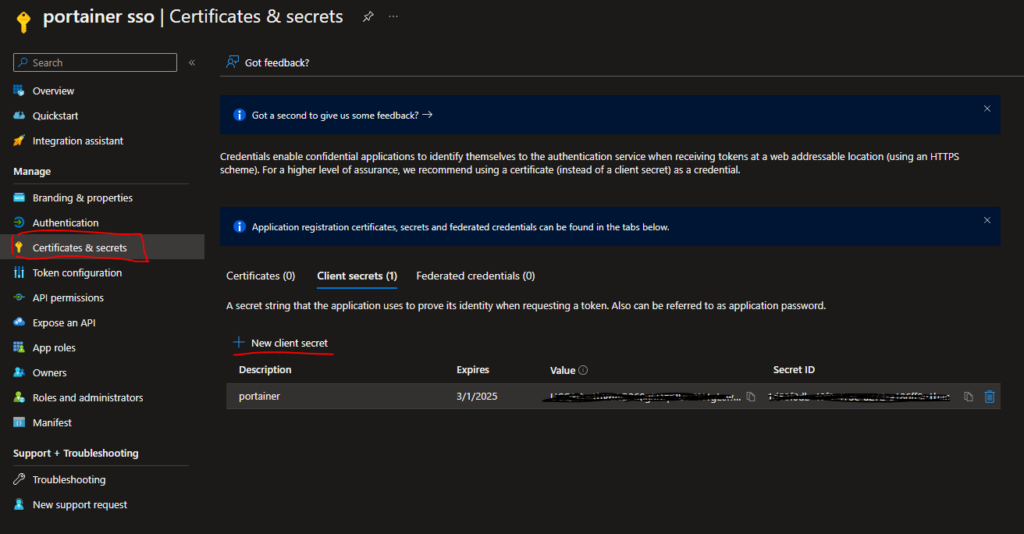
Under the Certificates & secrets section, create a new client secret by clicking on the + New client secret button. Set the expiration time for the secret based on your requirements and click on "Add". Once the secret is generated, copy the value of the secret to your clipboard or to a safe location, as it will be needed later for authentication purposes. Remember that this secret is sensitive information, so be sure to keep it confidential and secure.
Add Scope

To add the required API permissions in Azure Active Directory, follow these steps:
-
Click on API permissions in the left-hand menu.
-
Click on the + Add a permission button and select Microsoft Graph from the list of available APIs.
-
Select Delegated permissions and search for the following scopes:
- openid
- profile
-
Select the required scopes under Openid permissions and click on the Add permissions button.
-
Click on Grant admin consent for \
to grant the required permissions to the application.
Once the required permissions are granted, the application will be able to access the selected Microsoft Graph API resources on behalf of the user.
Portainer Settings
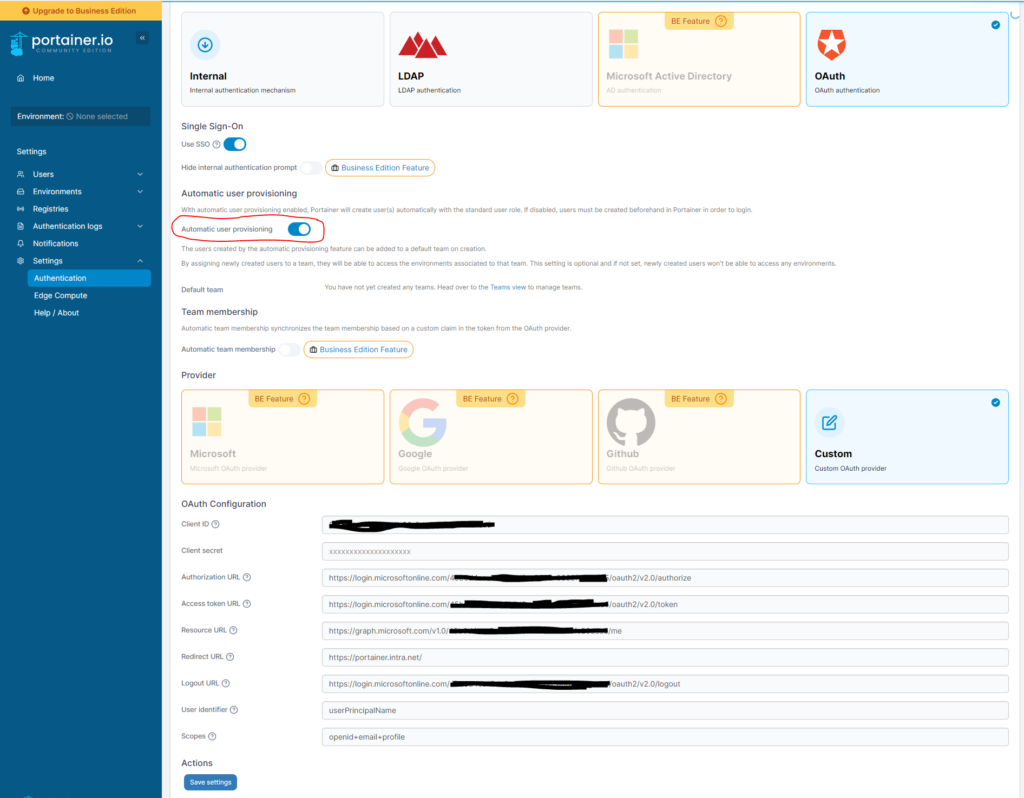
Here in the Portainer Settings, enter the information that you have copied from Azure. Replace the tenant_id with your Tenant ID from Azure.
- Client ID: Enter the client ID of the Azure AD app that you created
- Client Secret: Enter the client secret that you generated in Azure and copied earlier.
- Authorization URL: https://login.microsoftonline.com/{{ tenant_id }}/oauth2/v2.0/authorize
- Access token URL: https://login.microsoftonline.com/{{ tenant_id }}/oauth2/v2.0/token
- Authorization URL: https://graph.microsoft.com/v1.0/{{ tenant_id }}/me
- Redirect URL: The URL/IP that points to your portainer. e.g. http://myportainer.com or https://192.168.1.100:9443
- Logout URL: https://login.microsoftonline.com/{{ tenant_id }}/oauth2/v2.0/logout
- User Identifier: userPrincipalName
- Scopes: openid+email+profile
Note: instead of comma, use + to concatenate multiple scopes. The use of comma, will result in undefined scope error.
Click on Save to save the changes. Logout of your account and you should see the SSO option on the landing page.
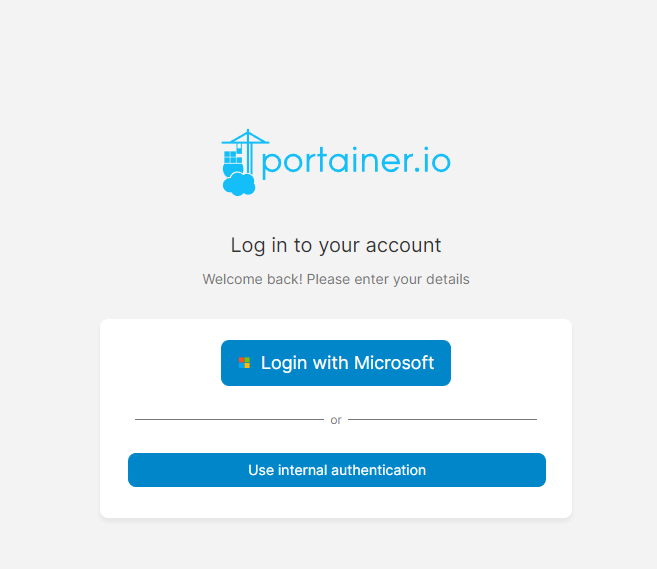
Congratulations! You have successfully configured Portainer to use Azure AD for authentication. Users will now be able to log in to Portainer using their Azure AD credentials. This can simplify the authentication process and provide a more seamless experience for users, while also improving security by using a centralized authentication system. Remember to test the authentication process thoroughly to ensure that it is working as expected. If you encounter any issues, refer to the documentation or reach out to the Portainer support team for assistance.
References
https://github.com/portainer/portainer/issues/6536
https://github.com/portainer/portainer/blob/edf048570bd3f2fe6903fbf95f4483149d7bfd4c/app/portainer/oauth/components/oauth-settings/providers.js