Setting up Live TV on Kodi for the Singapore Users
It has taken me a long time to figure out how to set up the Live TV on Kodi due to the lack of instructions online (Most of them only teach you how to install the software). And today I have finally managed to set up my kodi for Live TV. I hope that the following tutorial will be able to help the fellow singaporeans to set up digital tv service on their kodi.
What do we need?
- A TV Tuner(I am using a pcie tv tuner: WinTV-quadHD)
- Kodi
- tvheadend client
- tvheadend server
Set-up Guide
Personally, I am using LibreElec that comes with kodi and tvheadend client/server add-ons in the repository.
If you are using kodi as an stand alone app, you may wanna google how to install tvheadend client and server.
A simple guide on tvheadend set up here
Creating the Network
With kodi and tvheadend client/servers installed, let's start to configure the tvheadend.
First, connect to the tvheadend via the web browser.
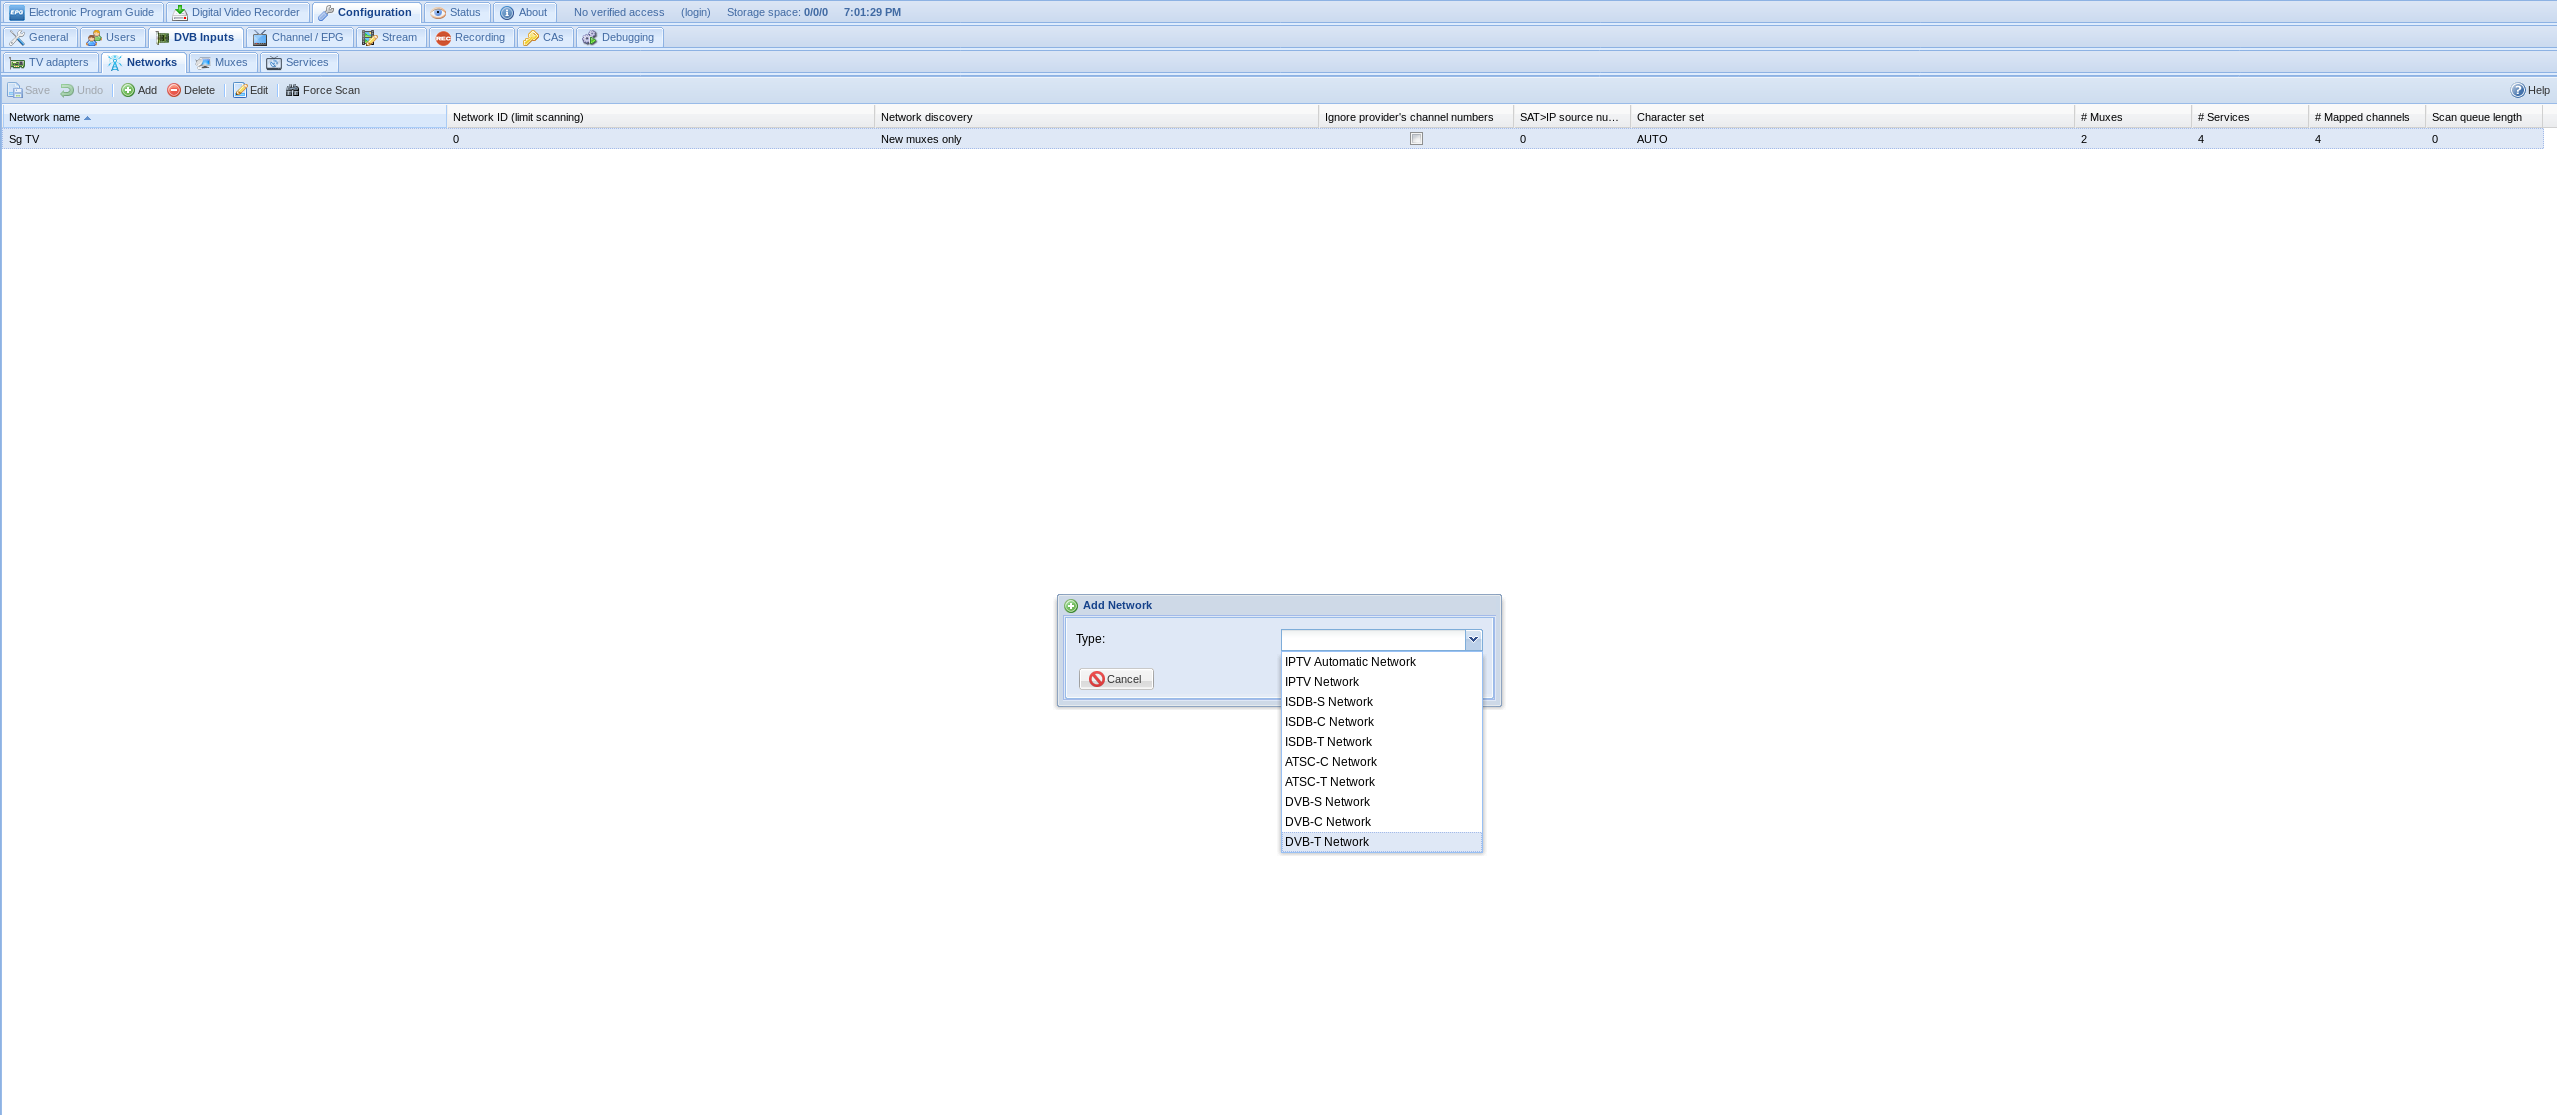
Navigate to Configuration > DVB Inputs > Networks and add a new network.
Select DVB-T Network from the dropdown list. You may wonder where is DVB-T2, but you will soon find out.
After we have selected the network type, we will now proceed to name the network. In my case, I just named it Sg TV.
(Optional: Change the Character Set to Auto.)
You do not need to change the provider network name, this will be auto-filled after you have added a channel successfully.
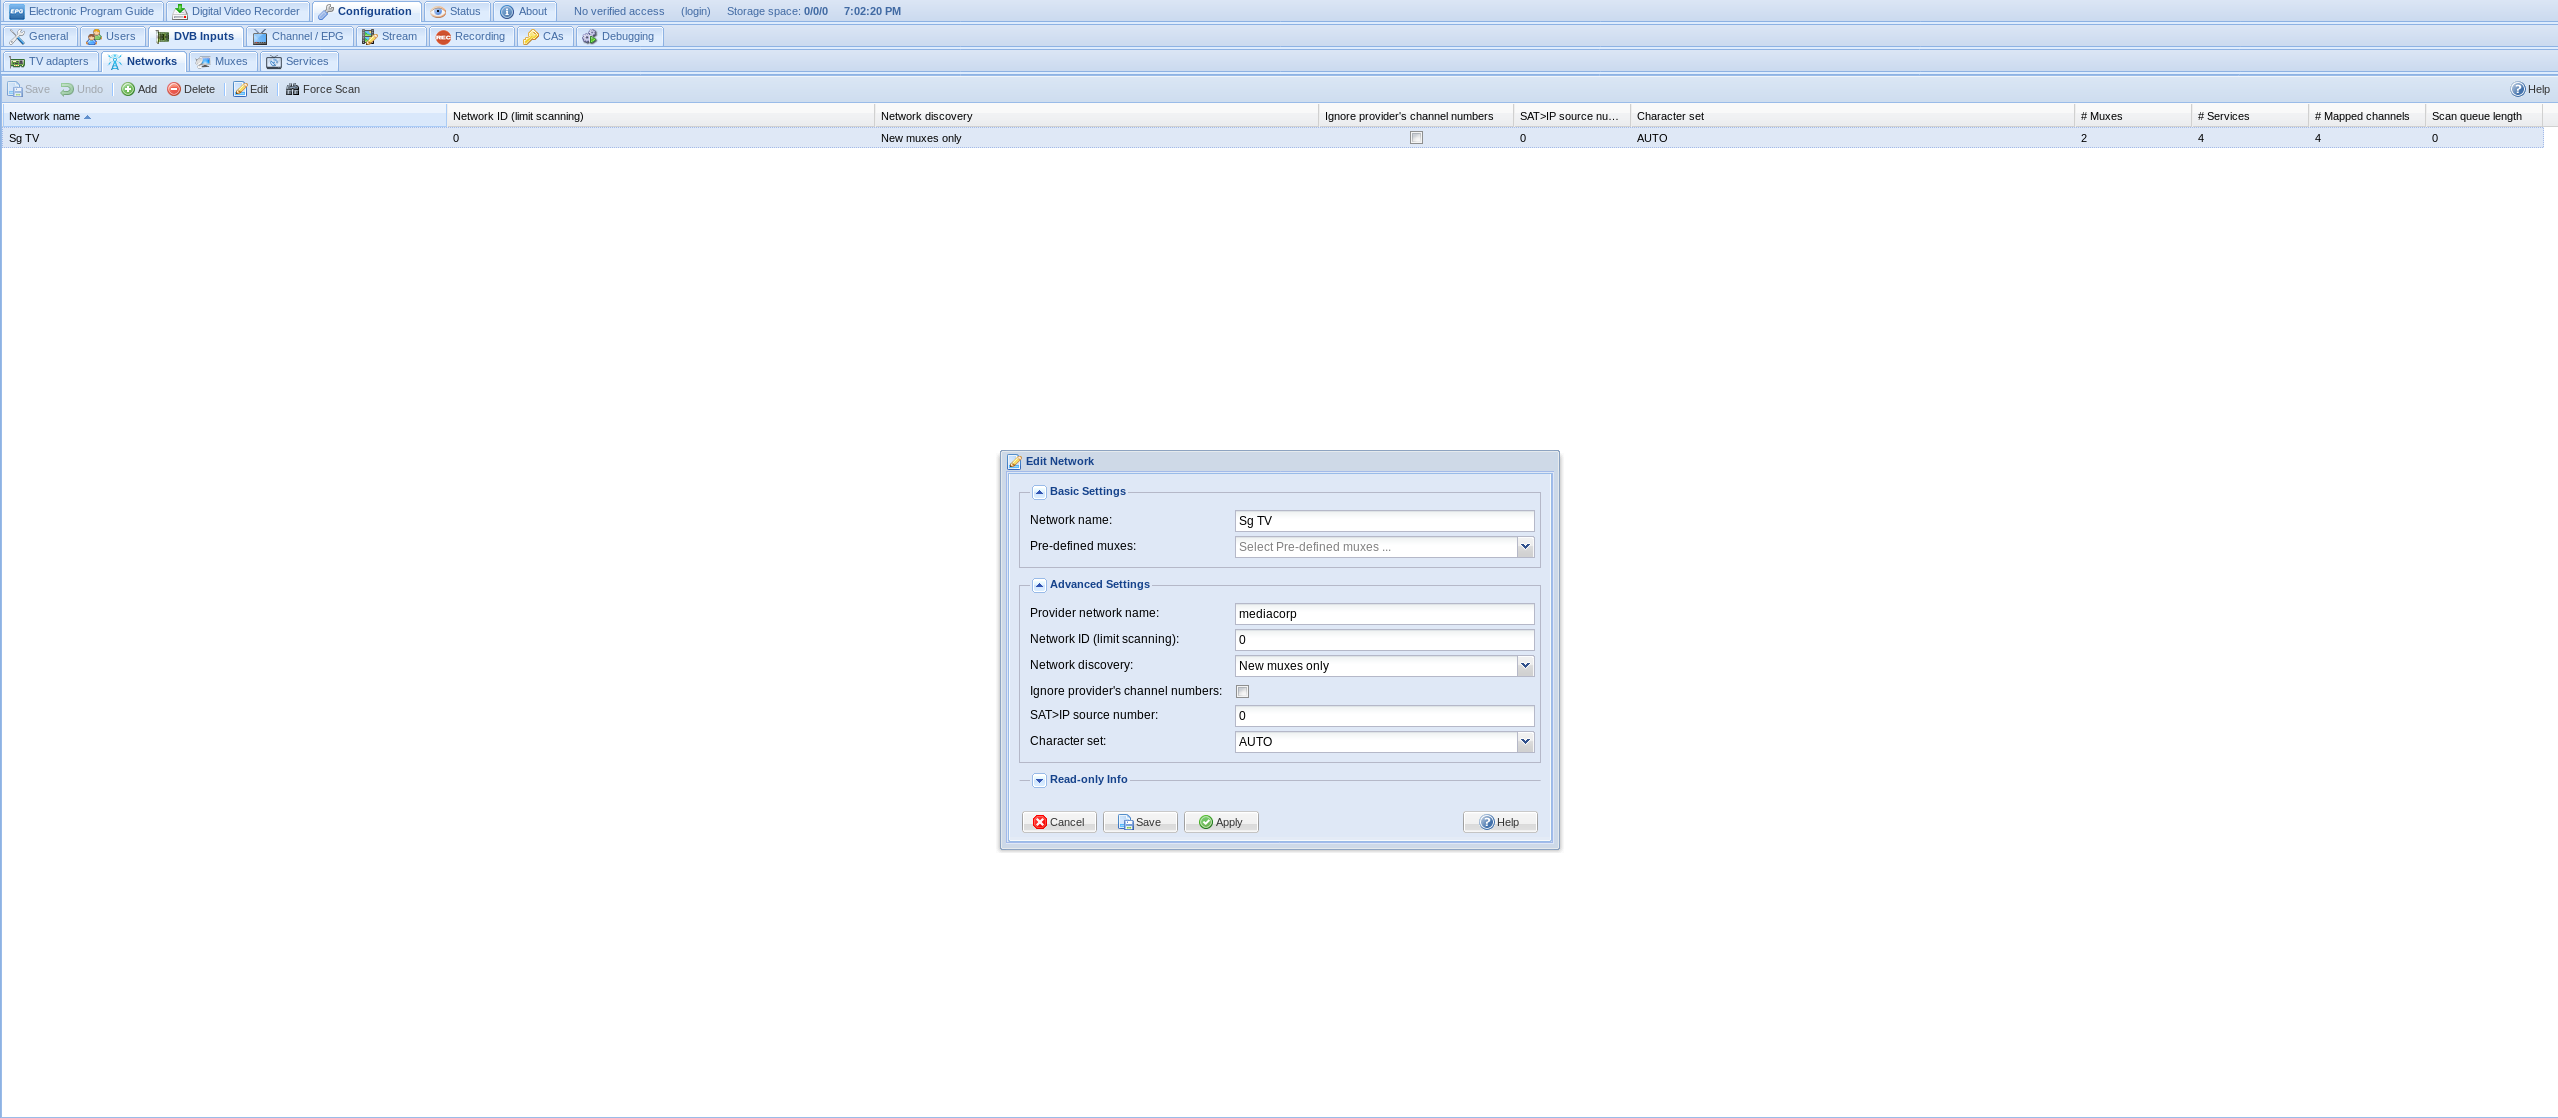
Leave everything else as it is, click Save and we will then move onto enable the adaptor.
Enable the Adaptor
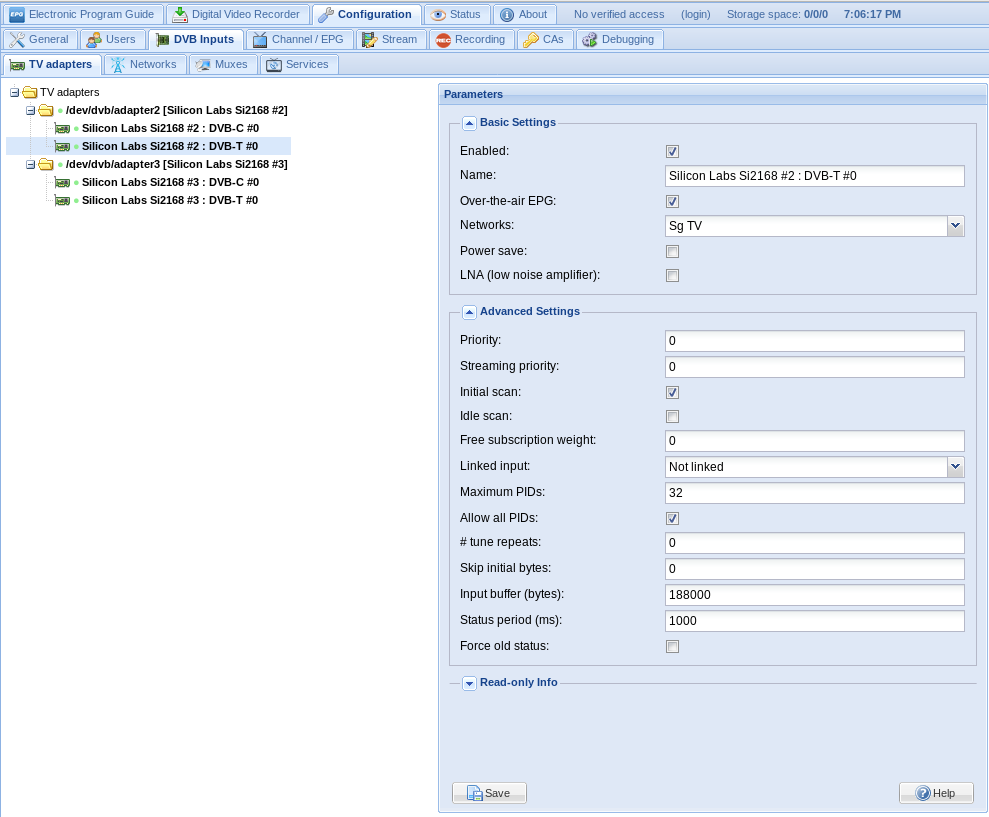
Select the adaptor from the list on the right that says DVB-T in the name.
Then the Parameters dialogue will show on the right as shown in the screenshot below.
Under Networks, select the network that you have created in the previous step.
Uncheck the idle scan and click on Save.
(If you have more than 1 adaptor, you may repeat this on the other adaptors)
Adding the Channel
Now let's add a channel manually.
Select the Muxes tab from the top.
Click on Add to add a new mux and select the network that we have created.
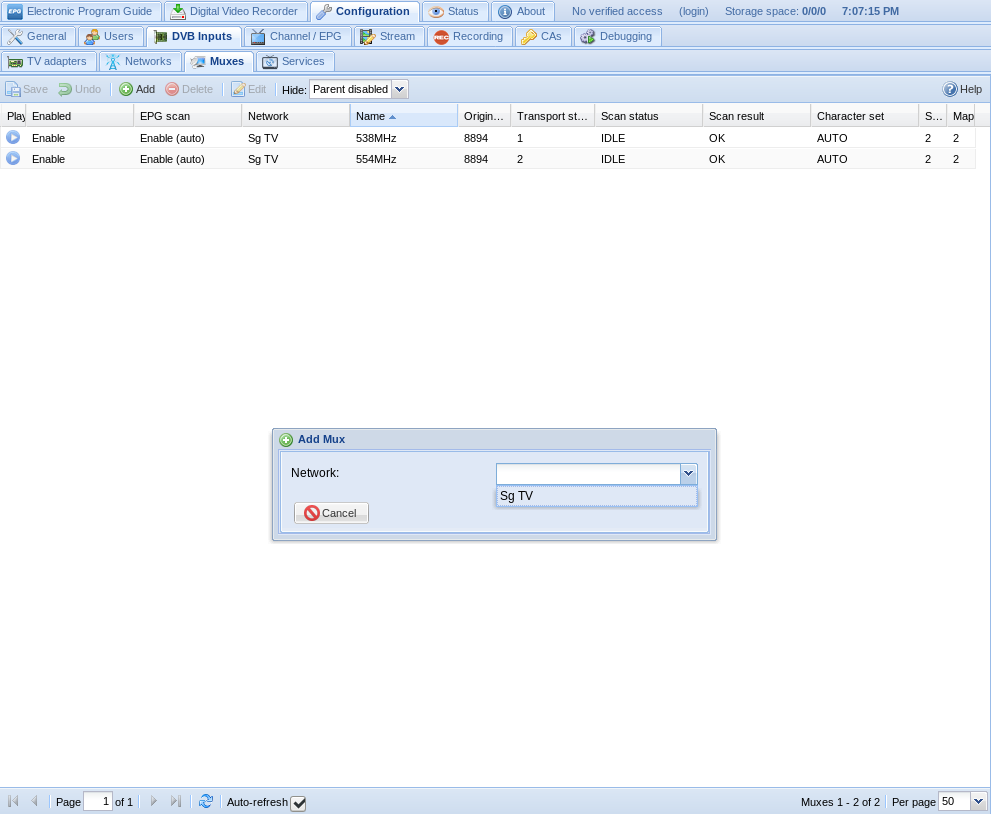
After that, a window showing the settings for the new mux will be displayed.
In this window, we will choose DVB-T2 as the delivery system. (Warning: Do not select DVB-T, it will not work. I know we selected that for all previous steps. That is the reason why I was not able to get my tuner to work all these while.)
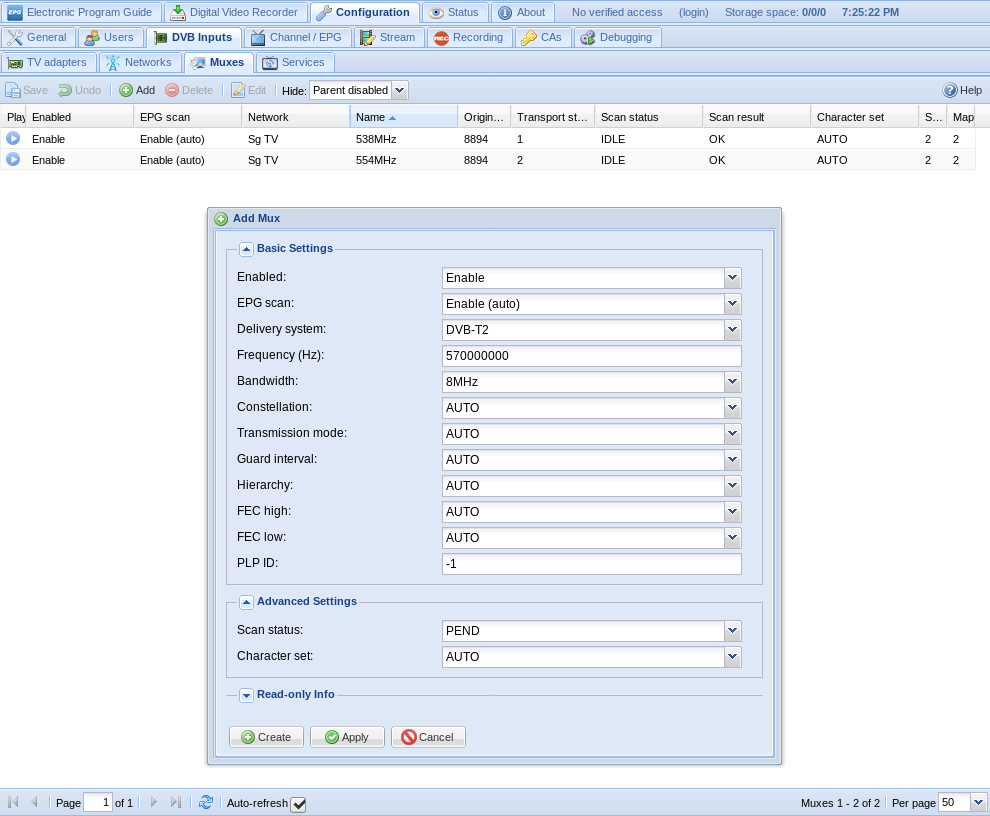
Depending on the frequency that we choose, there is a corresponding bandwidth. In my example above, I was trying to scan for Channel News Asia. Therefore, I have entered 570000000 (570MHz) which operates at Signal bandwidth of 8MHz.

So put those numbers into the respective fields.
Make sure we have enabled this mux (The first field at the top of the window).
Change the Scan status to PEND or ACTIVE and wait for your tvheadend to scan for the signal.
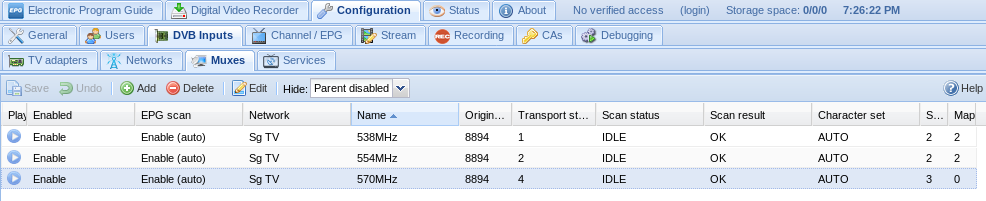
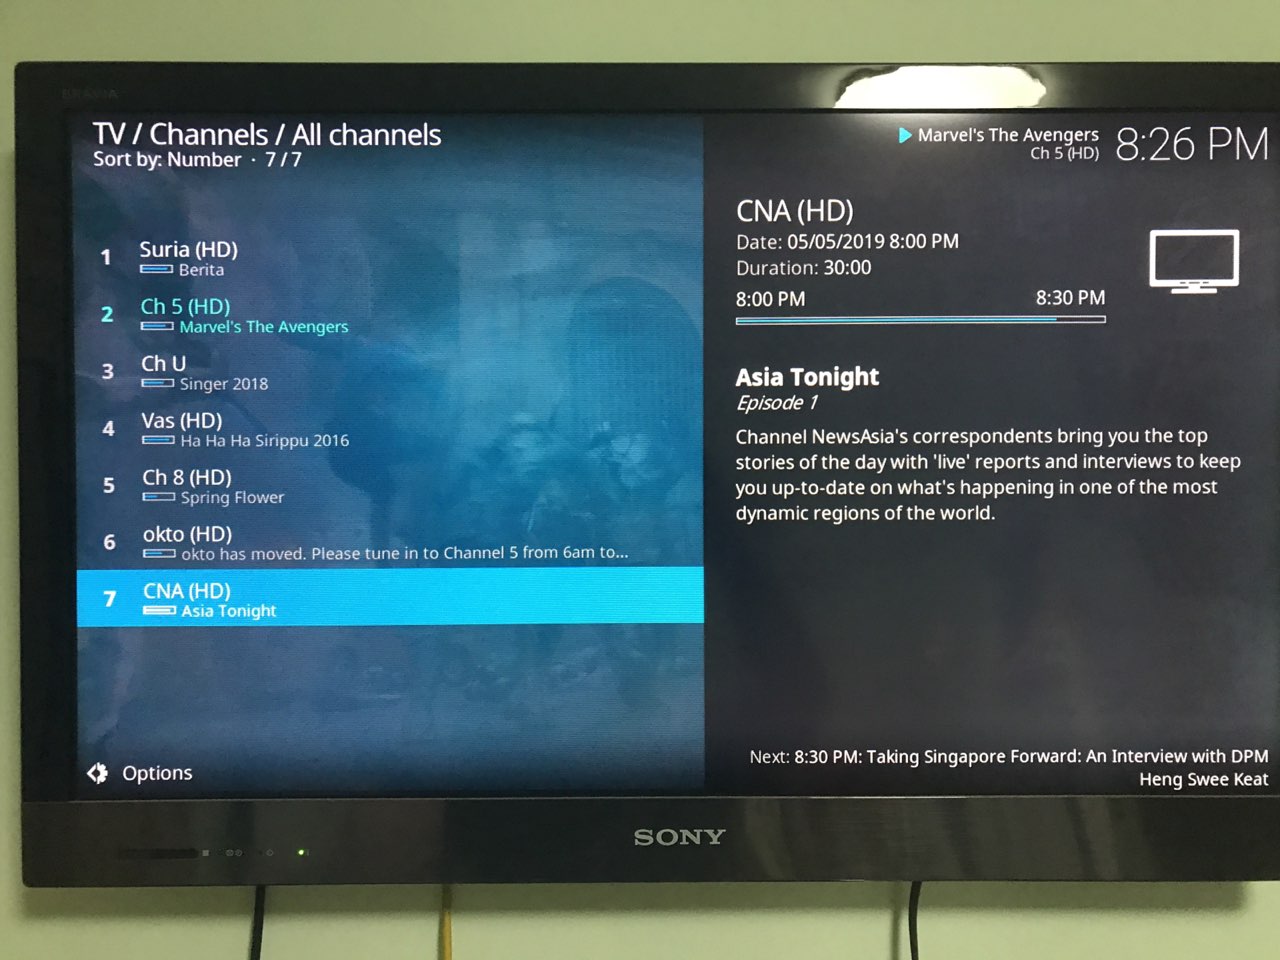
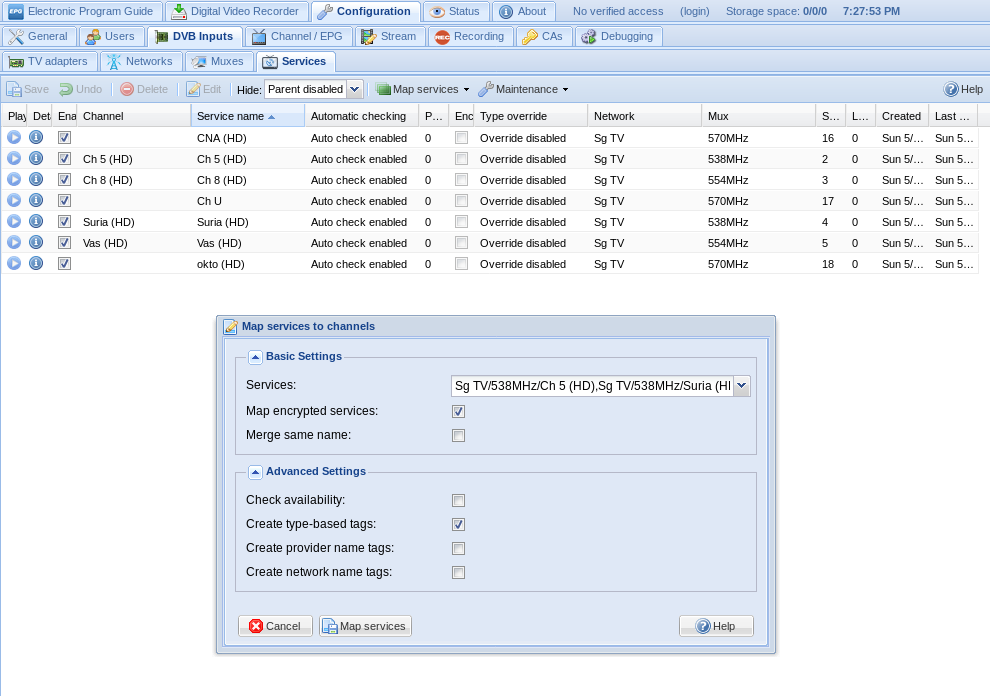
Once the scan is done, you will be able to find the TV channels under Services.
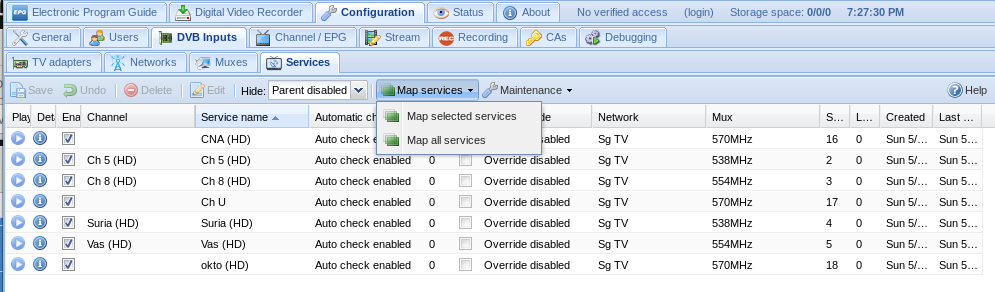
Just for simplicity, just map all services.
If you have done everything right, you may now sit back and enjoy your own custom digital tv set top box.